Every kid enjoys participating in different school invention projects since it provides them with a hands-on learning experience.
They get to put their imagination and creativity to good use. However, most of the time, especially when young kids are in question, parents are the ones who need to have ideas for project inventions.
Oftentimes, you might find yourself thinking about what to do next. Whether something useful, complex, or simple.
Don’t worry, you don’t have to waste any more time – we got you. Here are 10 easy kid invention ideas for 2nd graders that you and your kid will enjoy making them.
A List of 10 Easy kid inventions for 2nd graders
Miniature Volcano
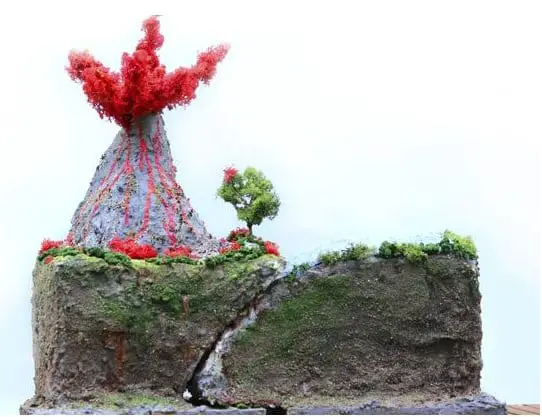
Making a Miniature volcano is a classic and amazing invention idea for school projects.
It’s the perfect way to teach kids how certain chemicals reach with each other and produce very interesting effects.
How to do it: Get a pan and stand a soda bottle on it. The pan should be covered with soil up to the neck of the bottle.
It’s very important to make sure that soil doesn’t get inside the bottle.
The next step is to add some baking soda inside the soda bottle very carefully. Then pour some vinegar.
Adding vinegar to baking soda will form carbon dioxide, which will erupt as smoke, similar to a real-life volcano.
Lava Lamp
Lava Lamps are very fun to look at and even easier to make at home.
How to do it: Get a flask or soda bottle with a cap. Fill the bottle until it’s ¾ full with vegetable oil or mineral water.
Fill the rest of the bottle with water. The next step is to add a few drops of food coloring of your choice.
You can even add sequins or glitter to make the lamp even more interesting.
The water as the food coloring will sink to the bottom of the bottle under the oil.
Next, you should break an Alka-seltzer tablet into several small pieces, and drop them in the bottle one at a time.
If you don’t have an effervescent tablet, table salt will create the same effect.
Final step – enjoy the show!
Mini Version of the Solar System
A miniature solar system is always a good idea to make for your kids’ school projects.
How to do it: You will need several foam balls in different sizes to make the planets, acrylic paints to paint each planet according to its right color (yellow for the Sun, red for Mars, etc.), an image of the solar system as a reference, cardboard as a base, and glue.
Start by painting the planets. While waiting for the paint to dry, start creating the base.
To create the universe, you can start by painting the base black and spraying a few bright colors to represent the stars.
The final step is to glue the planets according to their distance from the sun.
A Balloon Powered Car
With the use of a balloon, cardboard, and a few other items from your home, you can help your kid make a new toy.
I bet he or she will be especially proud of his or her new toy.
How to do it: You will need a piece of cardboard, a balloon, 2 wooden skewers, 3 straws from which one should be a bendy straw, four plastic bottle caps of the same size, tape, and scissors.
Start by cutting the cardboard in the desired shape. Tape the two straight straws on both sides of the cardboard piece with the masking tape.
They will as the axles of the car. Each bottle cap should be poked in the middle in the same width as the wooden skewers.
Each wooden straw should be placed through the straws. Attach the bottles at each end of the skewers so they serve as wheels.
As the last step attach the balloon to the bendy straw and tape it to the cardboard.
At last blow up the balloon, make sure to hold the open end of the straw, set the car on the flat surface, and open the end of the straw to let the air out.
You can encourage your kid to be creative and add different shapes to the car.
Create a new flower

Inventing a new flower is really fun, and your kid can be the proud inventor of a new flower type.
How to do it: You only need food coloring and white flowers. You can use a glass or see-through plastic container to fill it out with water.
When it comes to the color your kid can use one color or a combination of multiple colors. Usually, bright colors are giving the best results.
Cut the flower in the lower part of the stem and put it in a jar filled with water and food coloring.
After 24 hours, you’ll notice that the stem has absorbed the food coloring from the water, and the flower has changed its color.
When this invention is meant for a school project, make sure to do this as soon as possible before the school presentation.
Testing the Gravity with Paperclips
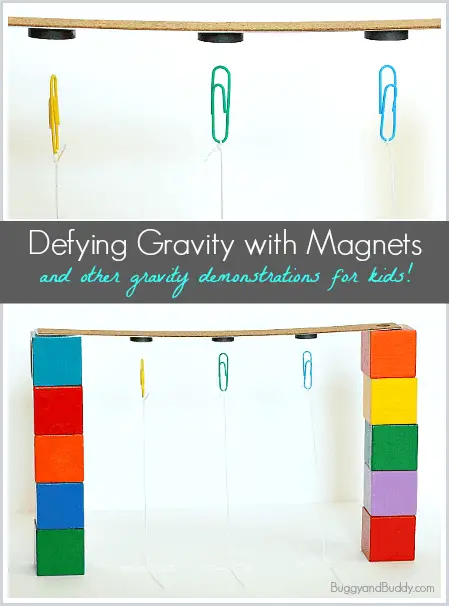
This is an interesting project that will teach your kids about the concept of gravity.
Using strings and paper clips will show them how gravity is responsible for pulling objects toward the Earth.
Also, your kids will get to play with magnets, which is fun on its own.
How to do it: For this experiment, you will need a stick or a small dowel, paperclips, string, scissors, tape, strong magnets (regular craft magnets won’t do you any good), blocks, or some other materials for stacking, metal ruler.
Start the experiment by tying the paper clips to several pieces of string. Then tie these strings on a piece of stick.
You will notice how the paper clips are pulled downward as you lift up the stick.
Even though the Earth’s gravity is pulling the paper clips, they won’t fall because the string is holding them in the air.
The second part of the experiment is taping the strings on a base. Then put the magnets on a metal ruler, and place it on 2 stacks of blocks.
Here you need to make sure that the magnets are facing down. Take one of the paper clips and bring it to a close range of the magnet.
You will see how the magnet is suspending the paperclip in the air. Repeat this with the other paper clips.
Kaleidoscope
Even though kaleidoscopes are not considered that much of an invention, they are still a pretty interesting idea for a school science fair.
They are very fun to make.
How to do it: You will need a cardboard cylinder, black construction paper, a clear plastic cover, tape, ruler, scissors, glue, markers, glitter, sequins, or other colored beads.
Start by drawing a rectangle on the plastic cover with measurements of 8×4 inches.
Then dra3 horizontal lines on the rectangle with a distance of ¼ inches from each other. Following these lines, fold the sheet into a triangle.
Make sure to leave the last part of the quarter on the outside and tape it, so the triangle doesn’t come undone.
The next step is to slip the plastic triangle into the 8 inches long cardboard roll.
Take the construction paper, poke a hole in it and tape it at the end of the cylindrical piece of cardboard.
At the other end, place some plastic wrap and push it down a little so it’s created a little pouch.
Then you should fill out this little pouch with sequins and beads of your choice.
Lastly, cover up the open side by taping a piece of waxed paper.
After cutting all excess bits, let your kids get even more creative by letting them decorate the cardboard roll.
Castle Lantern

Who doesn’t love Lanterns of any shape and form, especially a castle?!
How to do it: Download printouts either from the internet, or let your kid draw his own castle, scissors, Xacto knife, paper glue, and Led votive.
Use scissors to cut out each side of the castle. Using a Xacto knife cut out the little windows.
Then cut bigger tissue papers than the actual windows on the castle and glue them to the castle’s backside.
This way you will create cute little windows.
The next step is to connect each side of the castle by gluing them.
Lastly, put your castle lantern over your LED votive and enjoy the show.
Borax Crystal Flowers
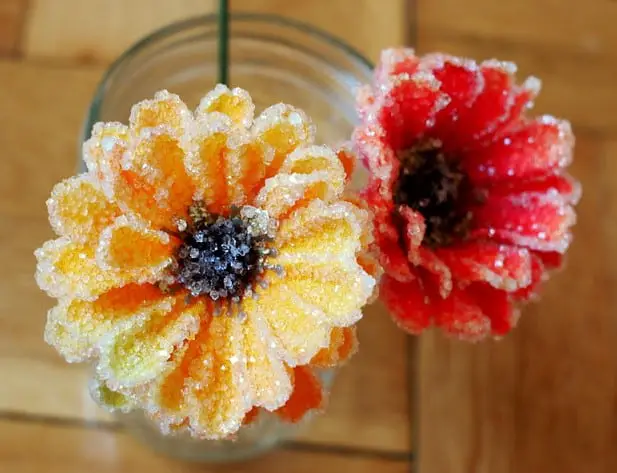
How to do it: You need containers, borax, fake flowers, string, pencils, paper towels, and spoons.
Start by removing the leaves from the fake flowers. Then tie the stems of the flowers to pencils using string.
Boil the water and pour it into your empty containers. Pour several spoonfuls of Borax until the Borax no longer dissolves.
Let your flowers’ heads hang over the containers. Make sure the flower heads don’t touch the bottom or sides of the container.
Let them sit in the container for several hours.
When you have enough crystals on your flowers, set them to dry standing up.
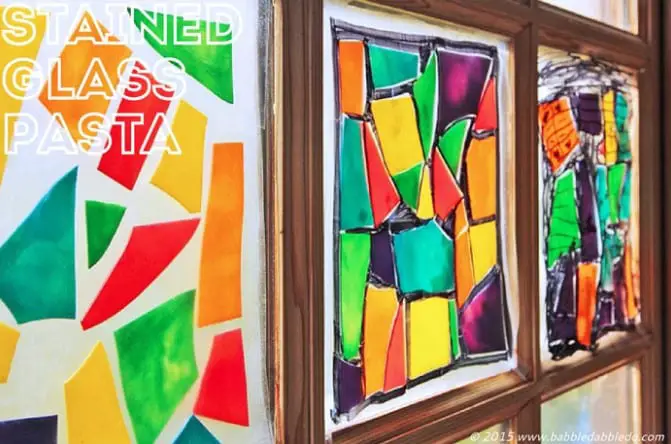
Stained Glass Pasta
How to do it: Flat pasta, food coloring or liquid watercolors, rubbing alcohol, Ziploc bags, 2 pieces of sticky-back paper per window or clear contact paper, tape, and black sharpies.
Before starting, you need to break the lasagna into smaller pieces of different sizes and dye it.
You can check this tutorial on how to dye pasta.
The first step is to cut out several pieces of clear contact paper of the same size.
Then remove the backing from one of the pieces and using the painter’s tape, tape it on your working station.
Make sure to place the sticky side of the contact paper up.
For the next step, show your kids examples of what stained glass can look like, and let them do their layout.
Make sure they leave small gaps between the pieces.
Next, remove the backing from the second piece of contact paper and carefully place it over the finished layout.
Lastly, let your kid fill in the gaps with black sharpies for getting a stained glass effect.
Conclusion
Interesting invention projects for 2nd graders will enable your kids to find answers to their questions, and learn how to count, measure, and describe their projects qualitatively.
Most importantly encourage them to use their hands and heads so they feel proud of their inventions.